
This Blueprint generates a PHP snippet that adds a custom settings page to the WordPress admin.
The generated code creates a class that registers a menu (or submenu) page, registers a settings group and option, and renders a form with configurable fields such as text, number, checkbox, select, and more. All options are saved using the WordPress Settings API.
Use this Blueprint when you need a dedicated admin page to manage configuration options — for example plugin settings, theme options, feature toggles, or simple configuration values — without writing the boilerplate code manually.
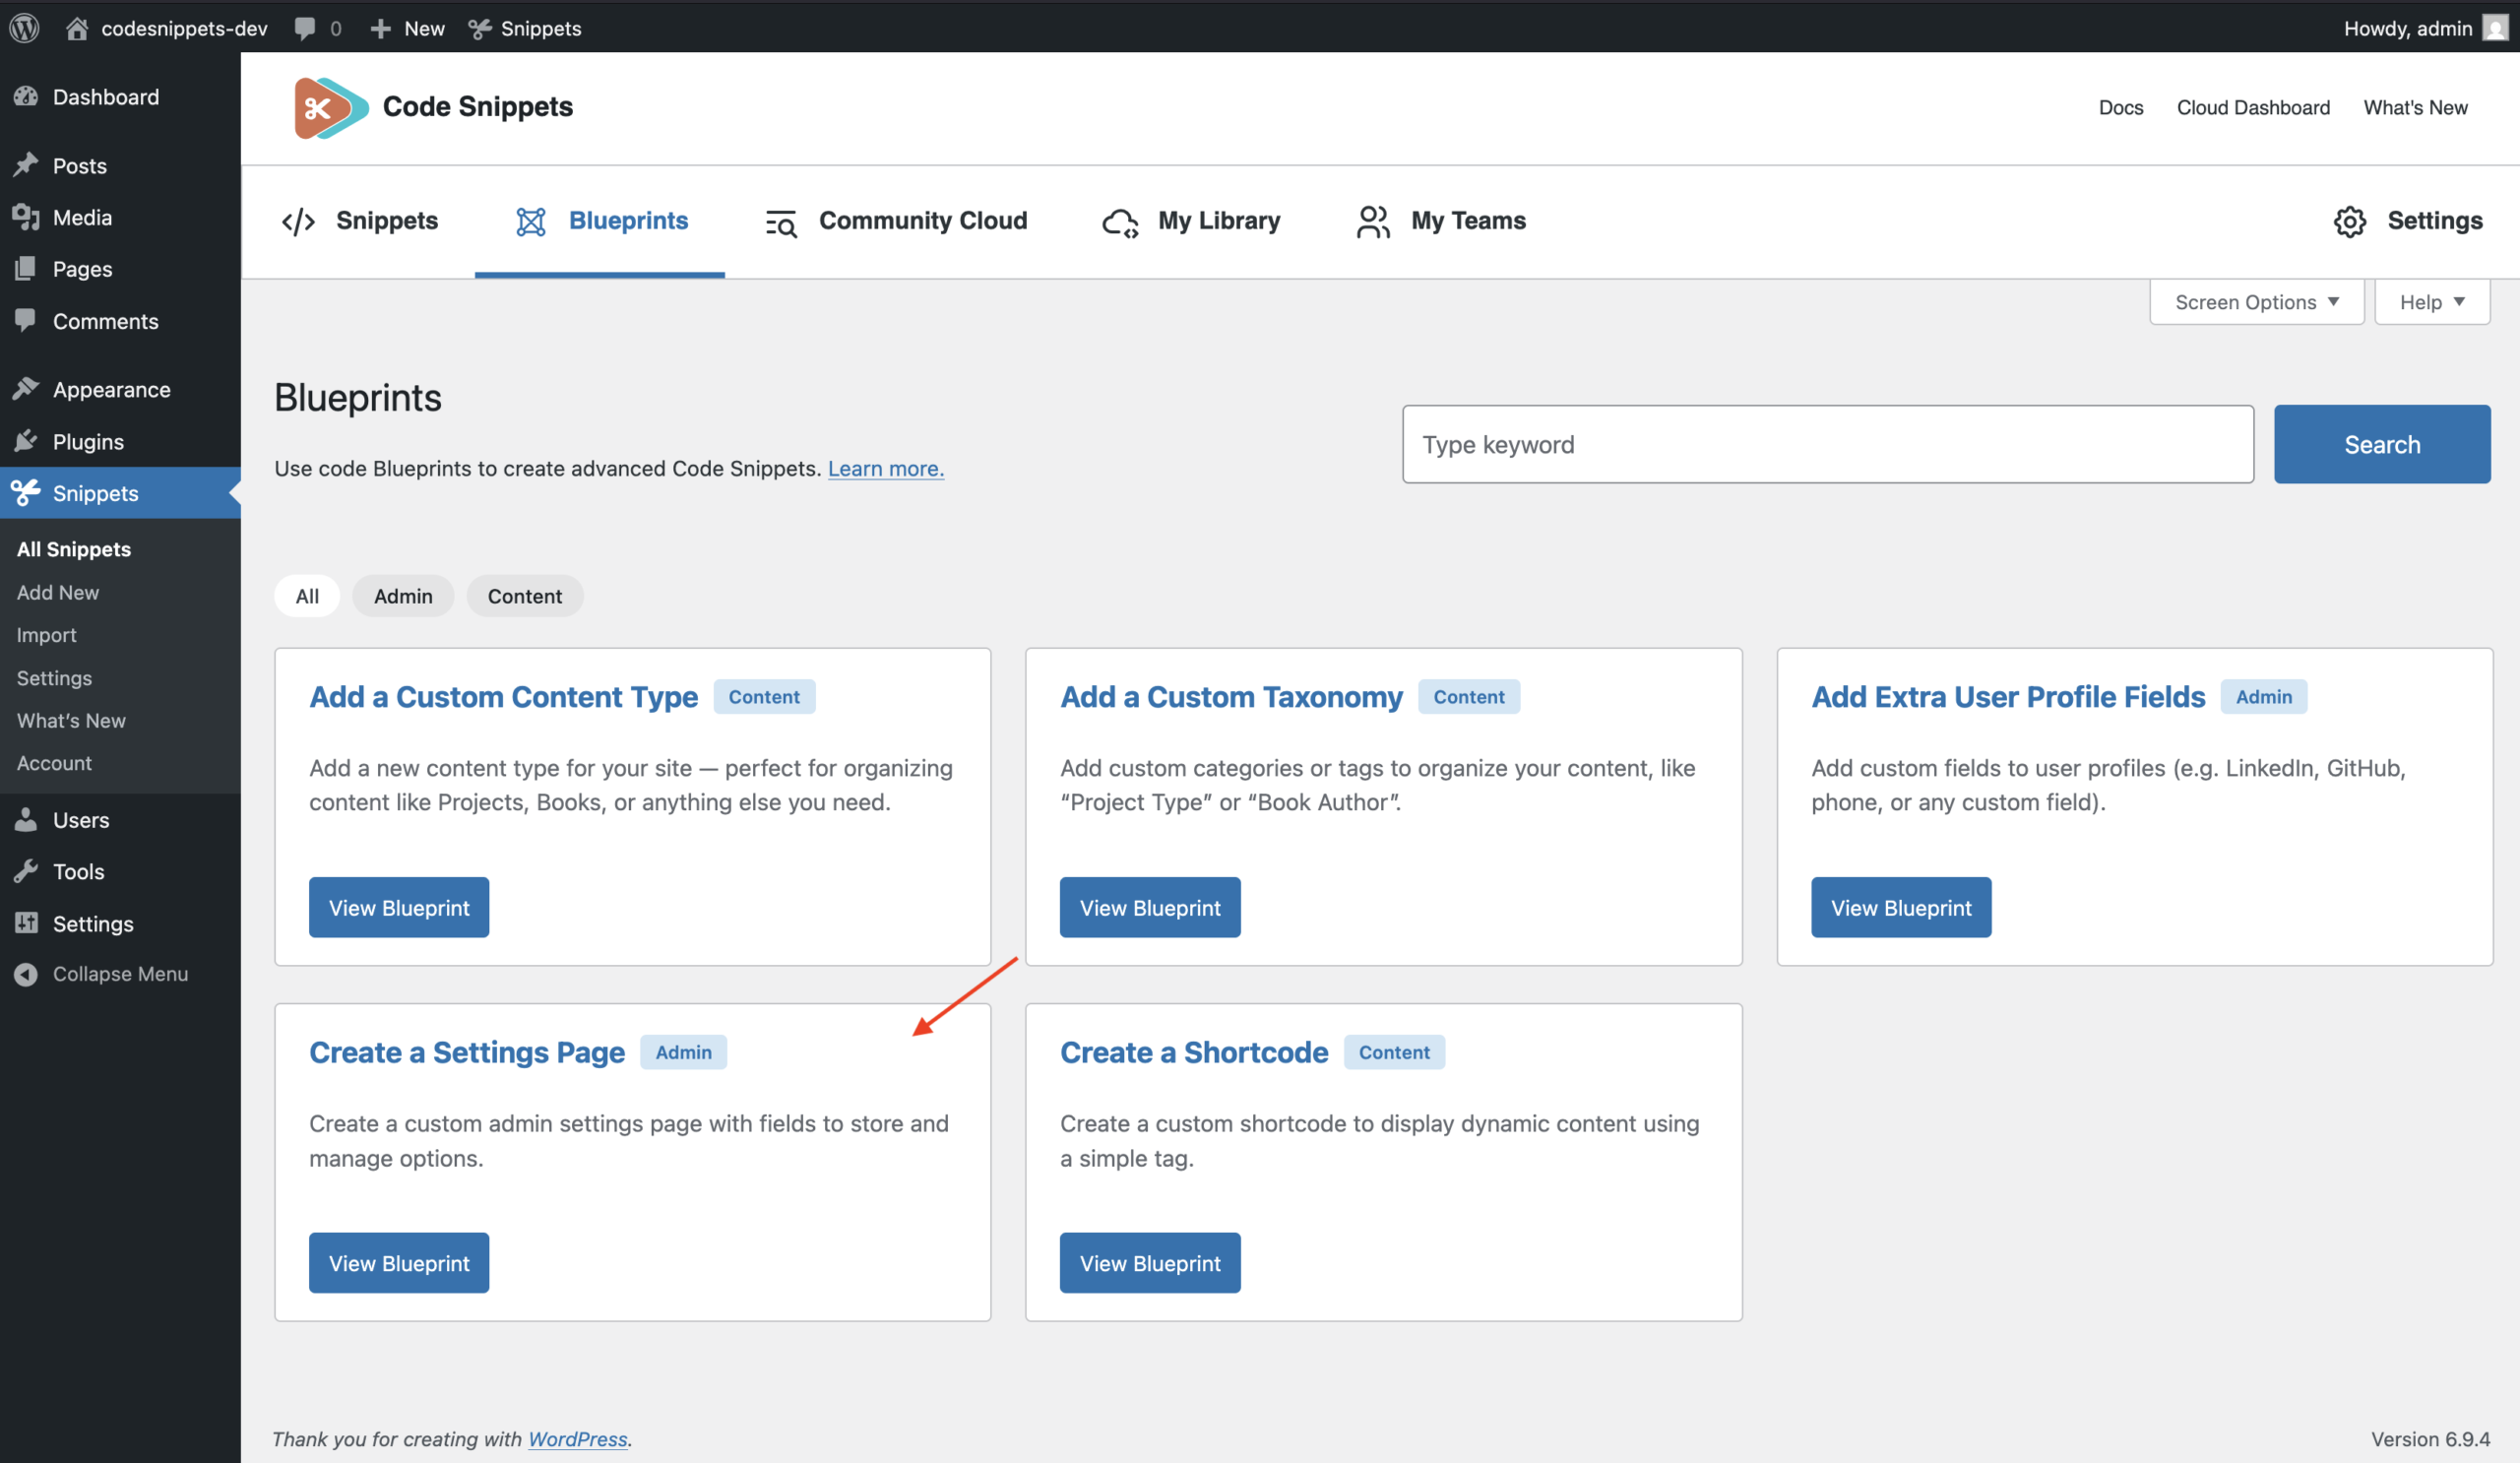
Before You Start
Try it immediately
This Blueprint includes a ready-to-use example configuration. If you generate the code and save it as a snippet without changing any fields, WordPress will create a working settings page where you can immediately test saving and retrieving options.
You can keep the default fields for testing or customize them to build your own settings page.
Unique identifiers
The generated class name automatically receives a unique suffix so that multiple settings-page snippets can exist without conflicts.
However, you should still ensure that the following identifiers are unique among your snippets and other plugins:
- Menu Slug
- Settings Group
- Settings Name
Capabilities
Choose a capability that determines who can access the settings page. For example: manage_options
Only users with the selected capability will see the menu item and access the page.
Configuration
General
Basic configuration for the settings page class and optional introductory content.
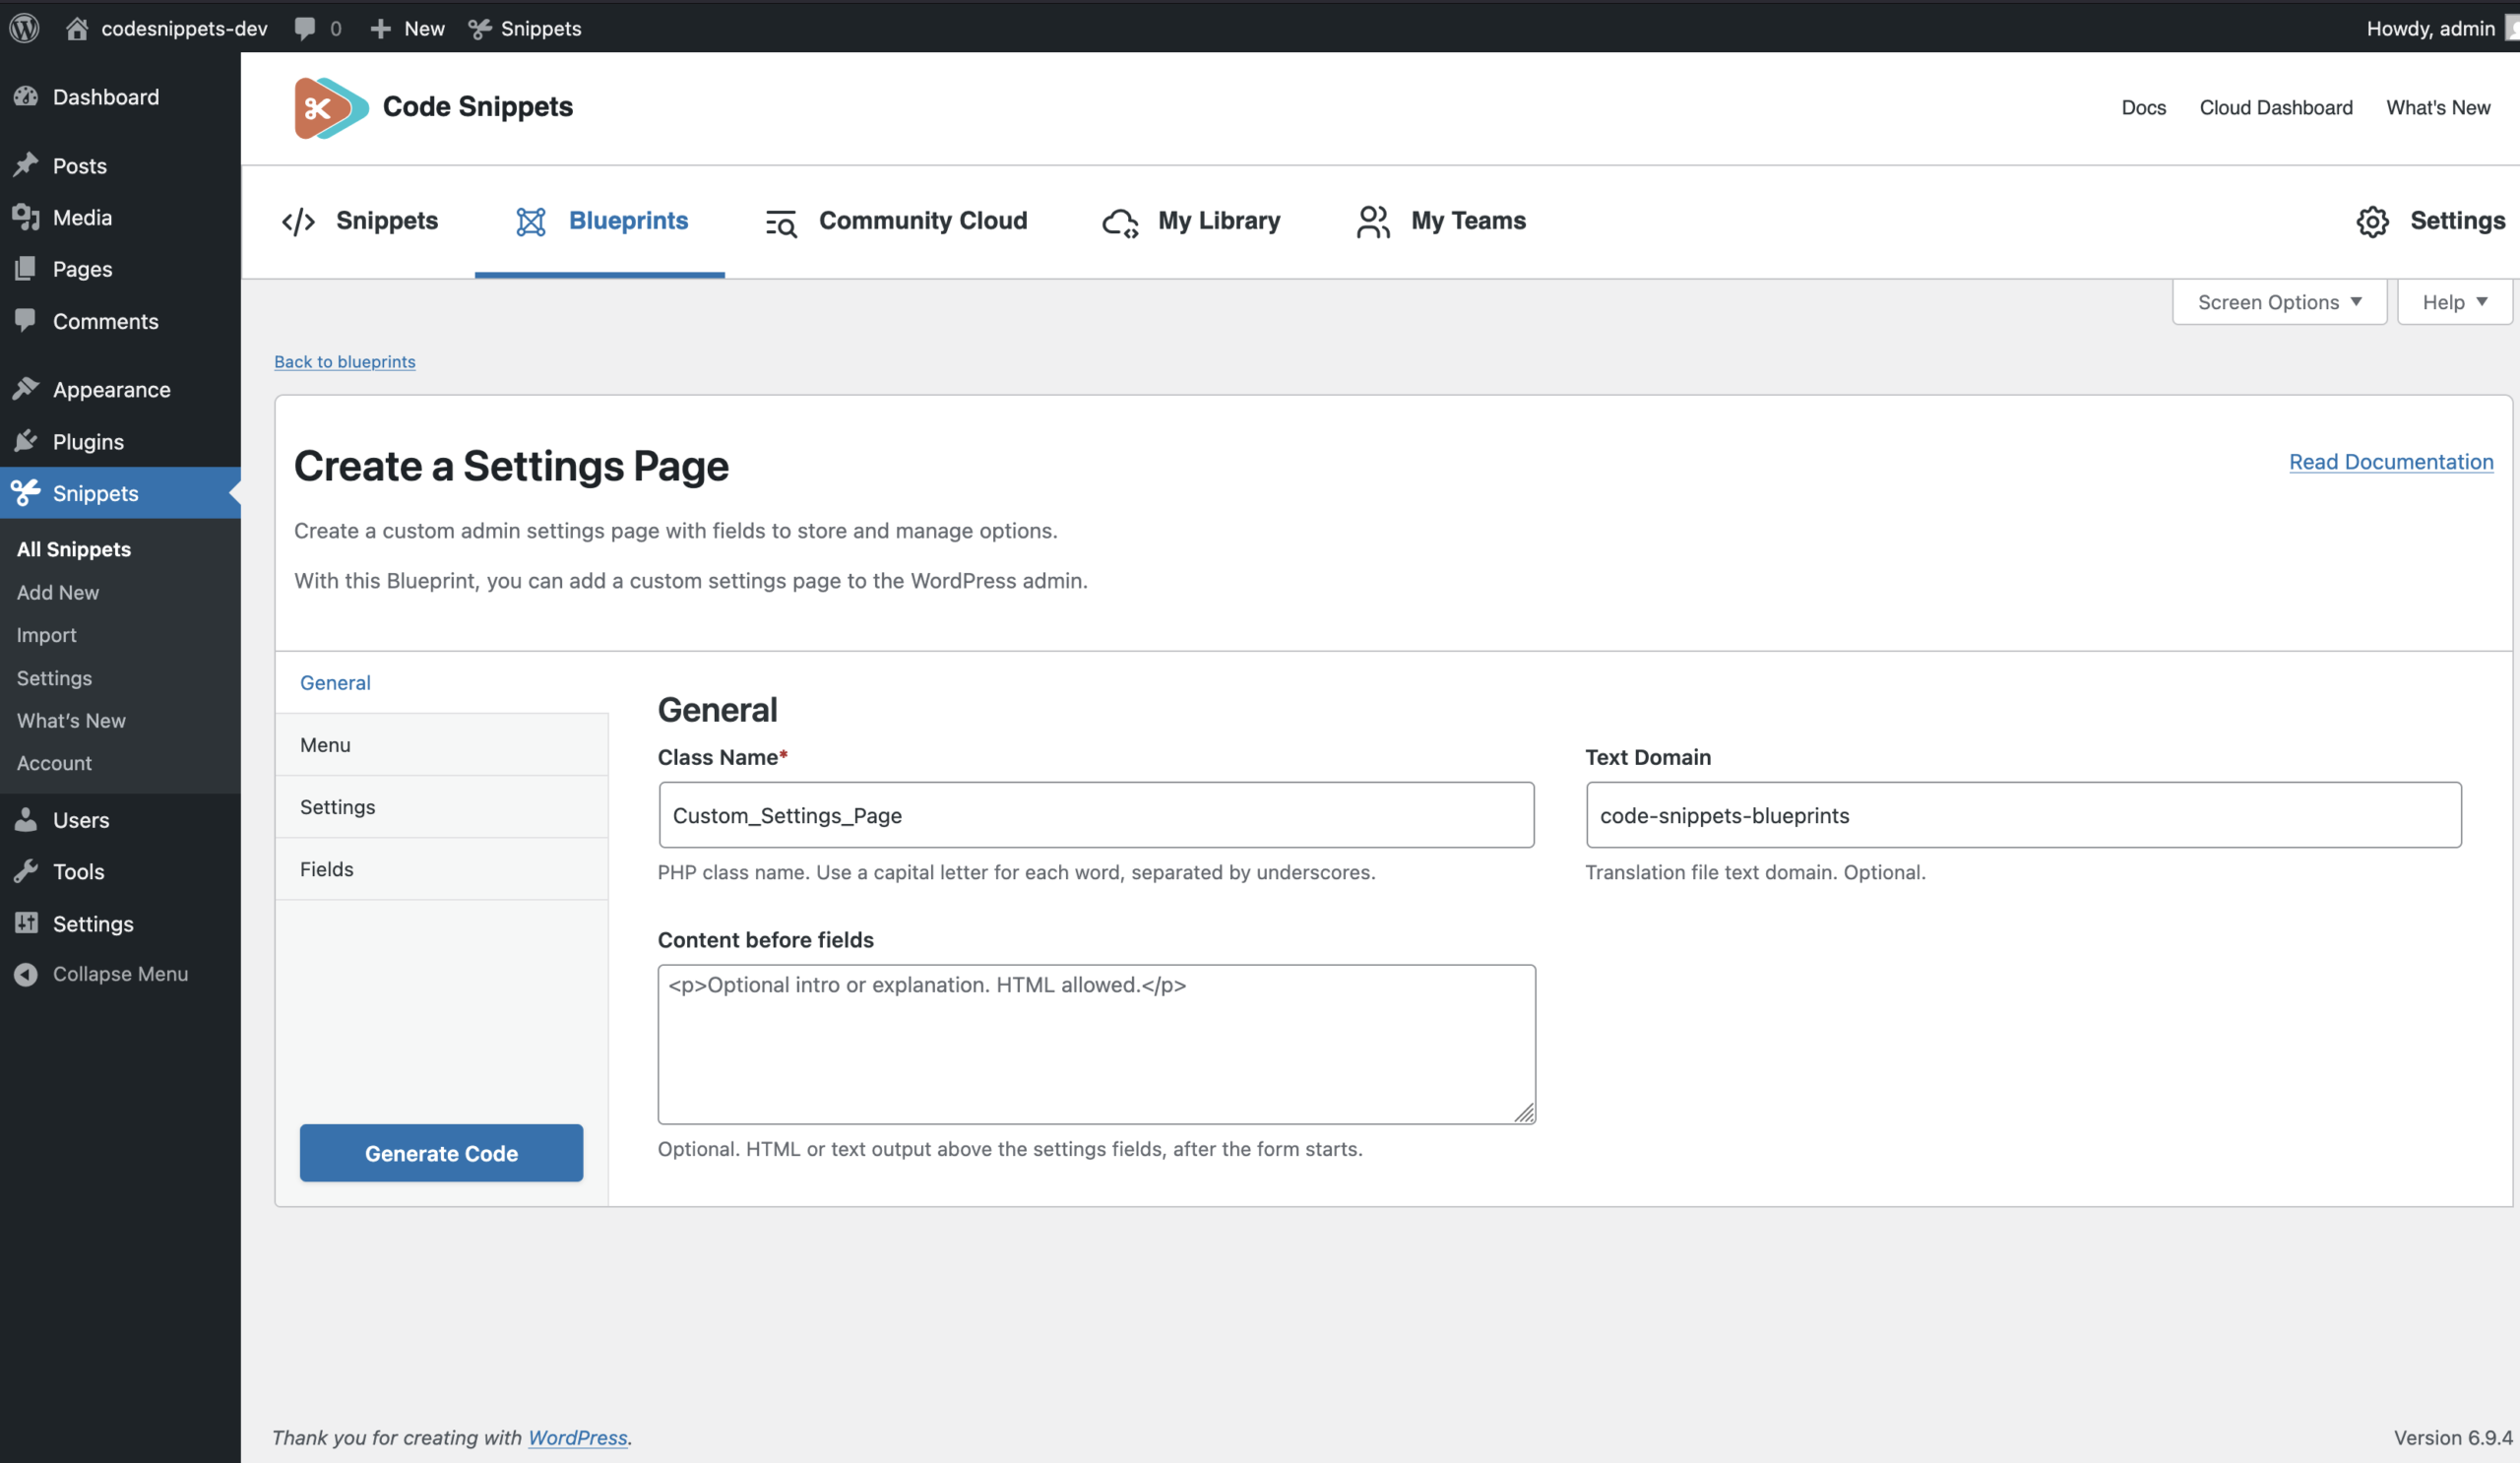
Class Name (required)
The base name for the PHP class that implements the settings page. Example: Custom_Settings_Page
Rules
- Required
- Must be a valid PHP identifier
- Typically uses capital letters and underscores
- No spaces allowed
The generated class name will include this value plus a unique suffix, for example: Custom_Settings_Page_a1b2c3
This prevents naming conflicts when multiple snippets are created.
Text Domain (optional)
The text domain used for translating labels and strings in the generated code. Example: my-plugin
Rules
• Letters, numbers, underscores, or hyphens only
When provided, labels and descriptions can be wrapped in translation functions such as: __( ‘Settings’, ‘my-plugin’ )
Content Before Fields (optional)
Optional HTML or text displayed above the settings fields on the page. This content appears inside the page before the settings fields and can be used for instructions or explanations.
Example: <p>Configure the options below.</p>
Menu
Controls where and how the settings page appears in the WordPress admin menu.
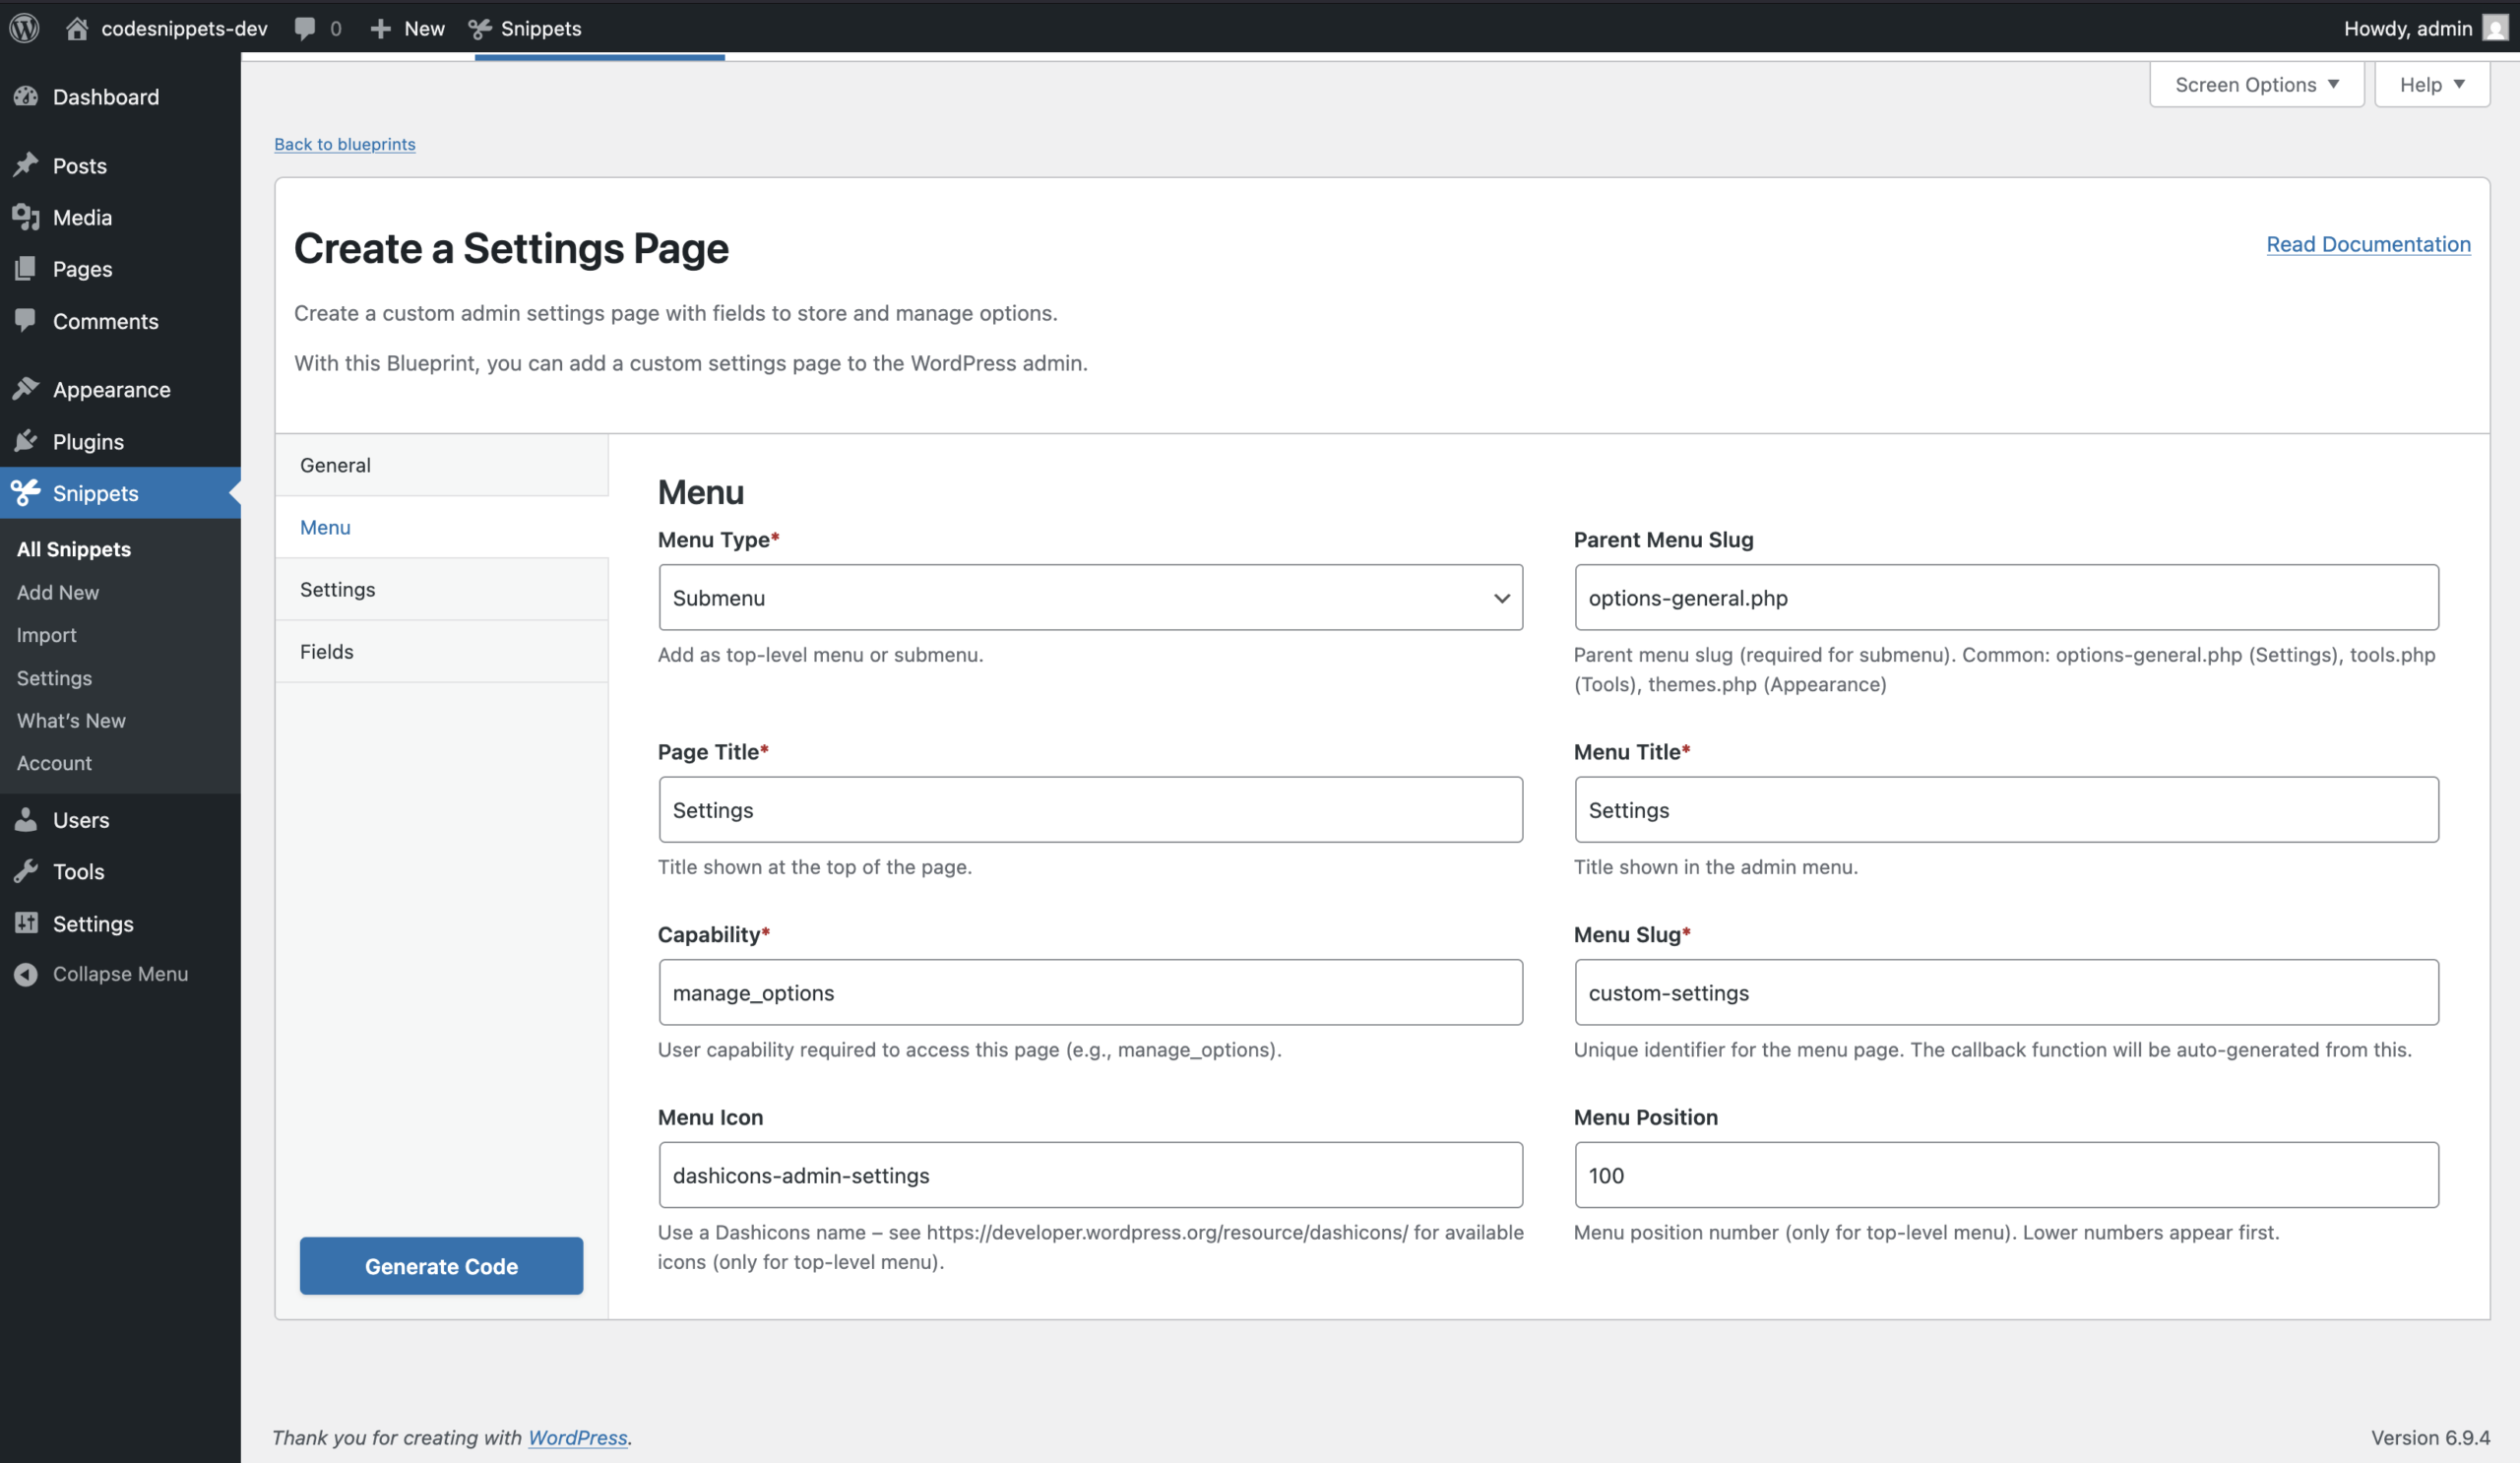
Menu Type (required)
Defines how the page is added to the admin menu.
Options:
- Top-level Menu – Creates a new main menu item in the sidebar.
- Submenu – Adds the page under an existing admin menu.
The generated code uses either: add_menu_page() or add_submenu_page()
Parent Menu Slug (required for submenu)
The slug of the parent menu where the page should appear when using a submenu.
Examples:
- options-general.php (Settings)
- tools.php (Tools)
- themes.php (Appearance)
The parent argument used in `add_submenu_page()`.
Page Title (required)
The title displayed at the top of the settings page and in the browser tab. Example: My Plugin Settings
Menu Title (required)
The label displayed in the admin menu. Example: My Settings
Capability (required)
The WordPress capability required to access the page. Users must have this capability to see the menu item and open the page. Example: manage_options
Menu Slug (required)
A unique identifier used in the page URL and for the callback function. Example: custom-settings
A WordPress key must follow these rules:
- Lowercase letters only
- Numbers allowed
- Underscores (_) and hyphens (-) allowed
- Maximum length: 32 characters
- No spaces or special characters
Menu Icon (optional)
The Dashicons class used for the menu icon. Only applies when using a “Top-level Menu”.
Example: dashicons-admin-settings
Menu Position (optional)
The numeric position of the menu item in the admin sidebar. Lower numbers appear earlier. Example: 100
Rules: Must be a non-negative integer.
Settings
Identifiers used by the WordPress Settings API to store option values.
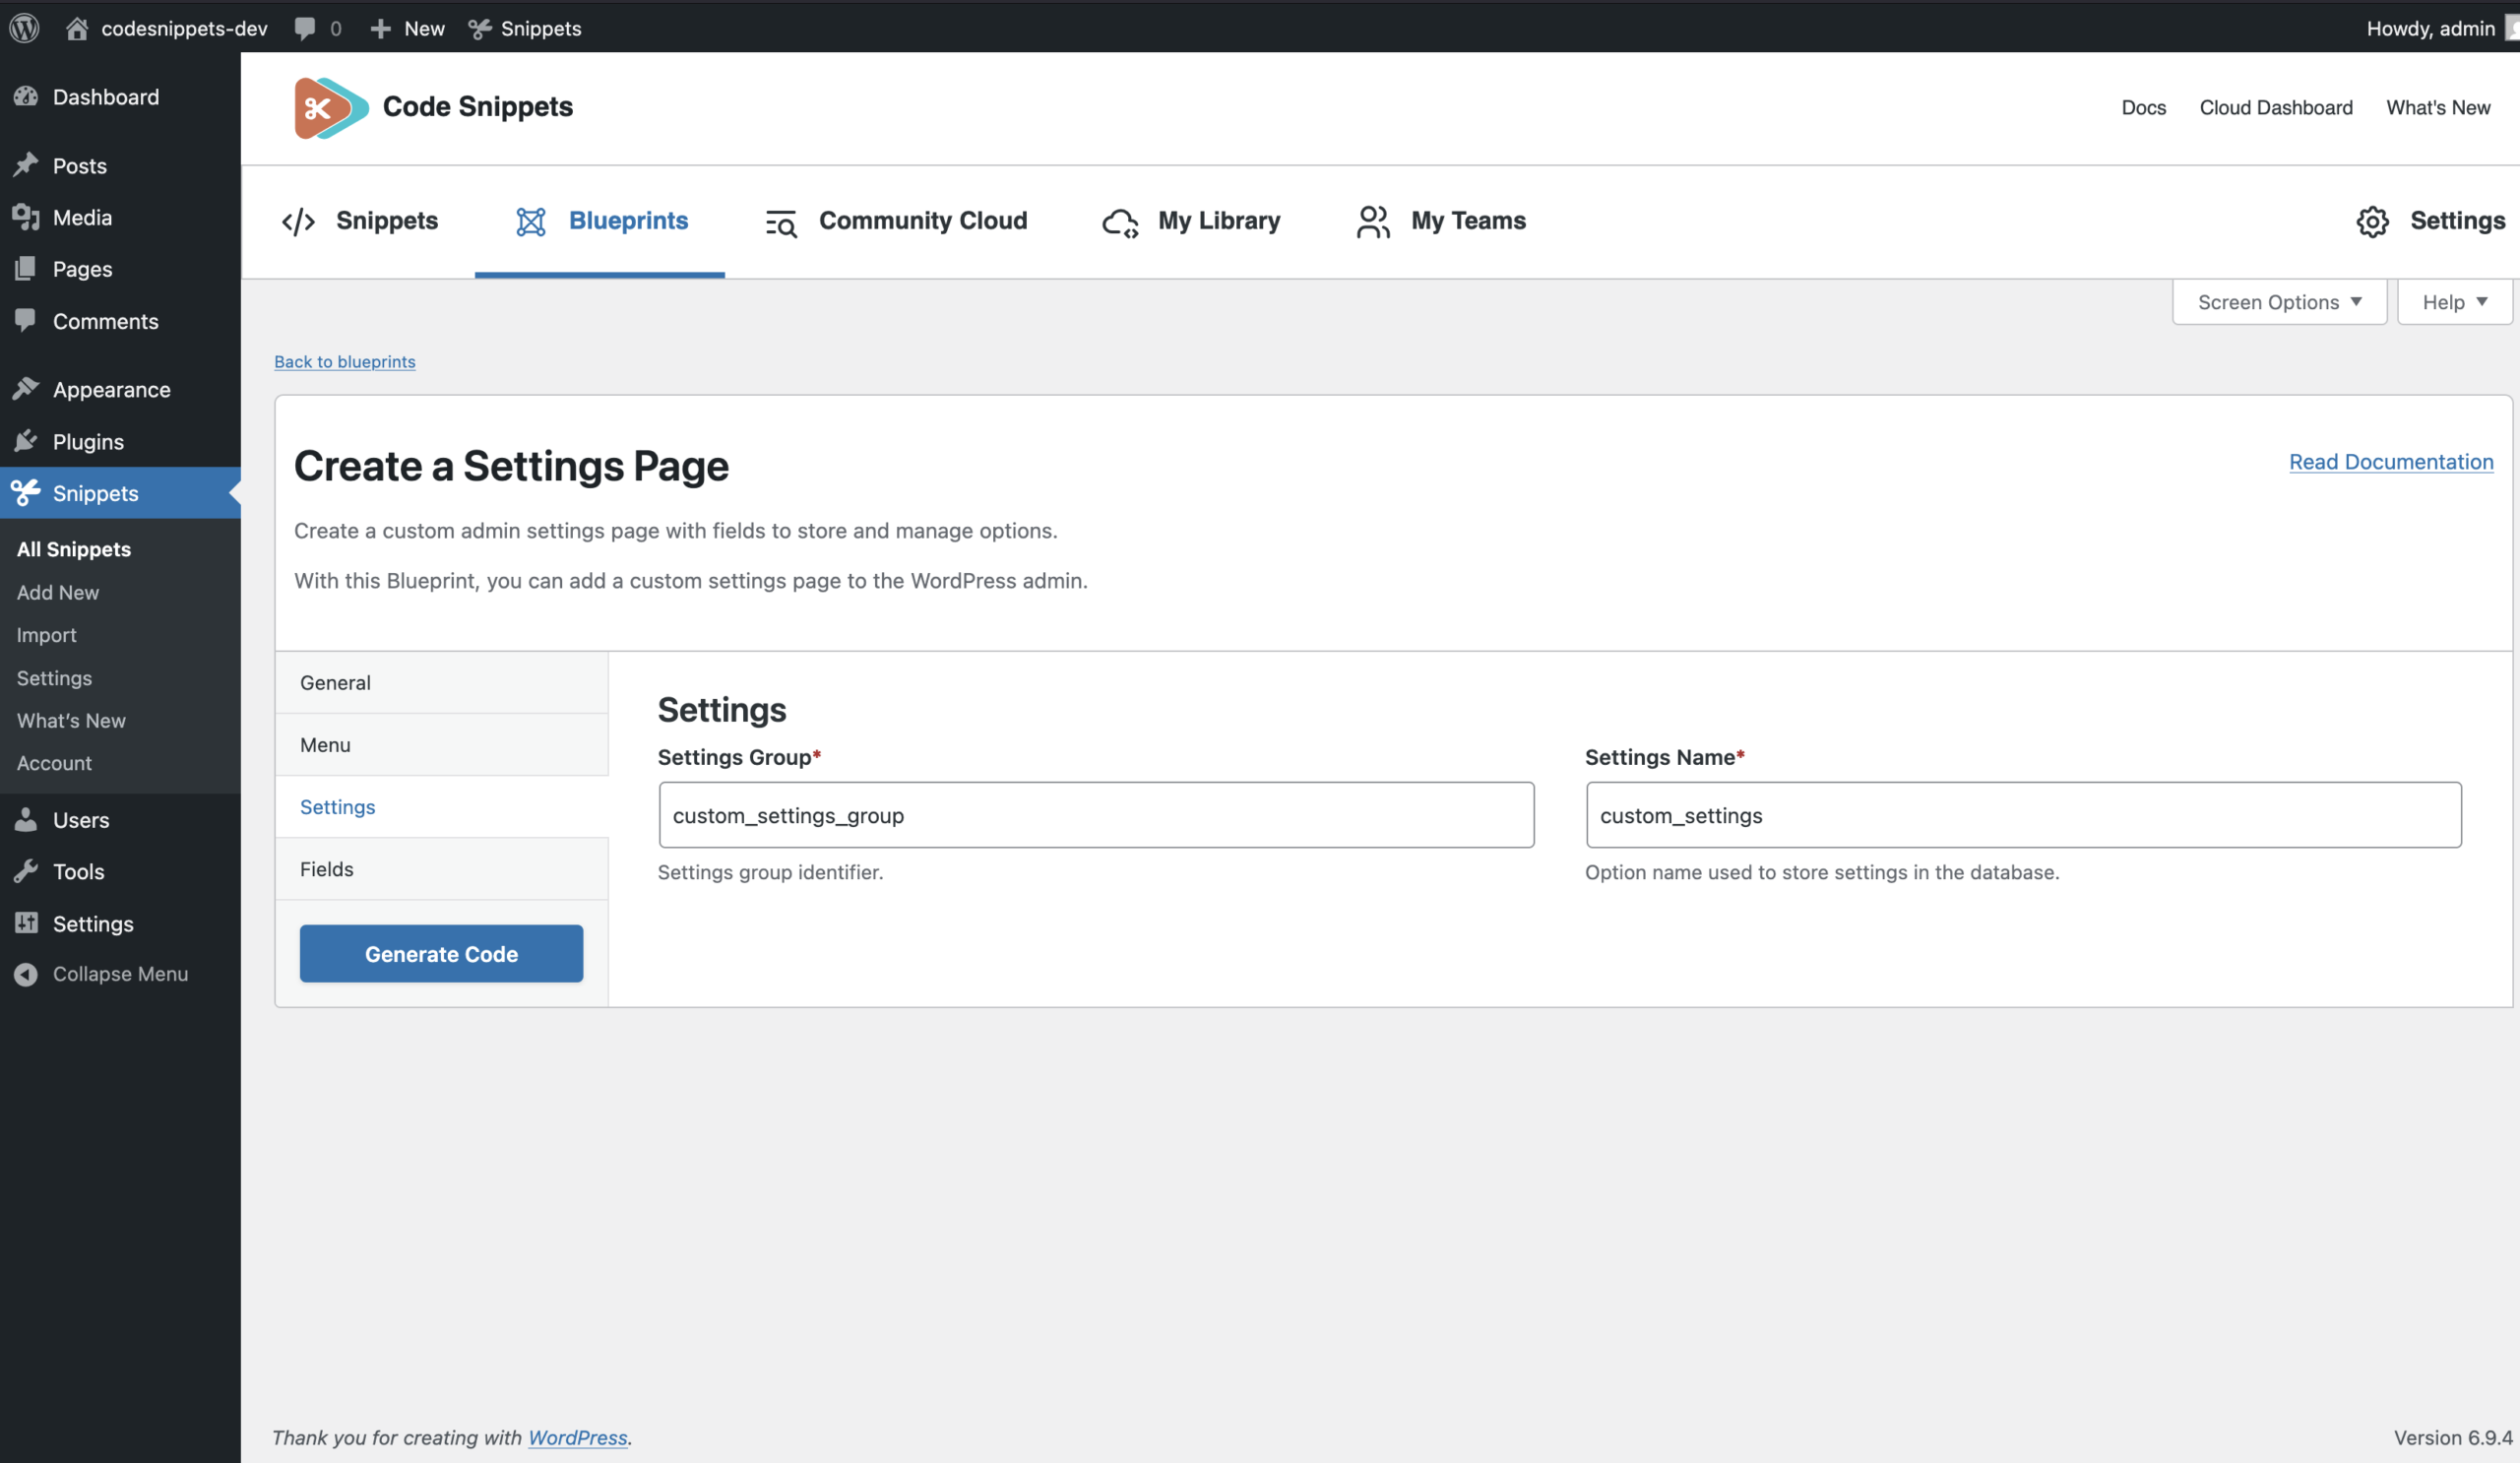
Settings Group (required)
The settings group identifier used when registering the option. Example: custom_settings_group
Rules: Must be a valid WordPress key.
Settings Name (required)
The option name used to store all field values in the database. All field values are stored inside this option as an associative array. Example: custom_settings
Example stored structure:
custom_settings_group = [
'example_setting' => 'Example Setting',
]
Fields
Settings fields are defined using a repeater, meaning each row defines a single form field. At least one field must be added.
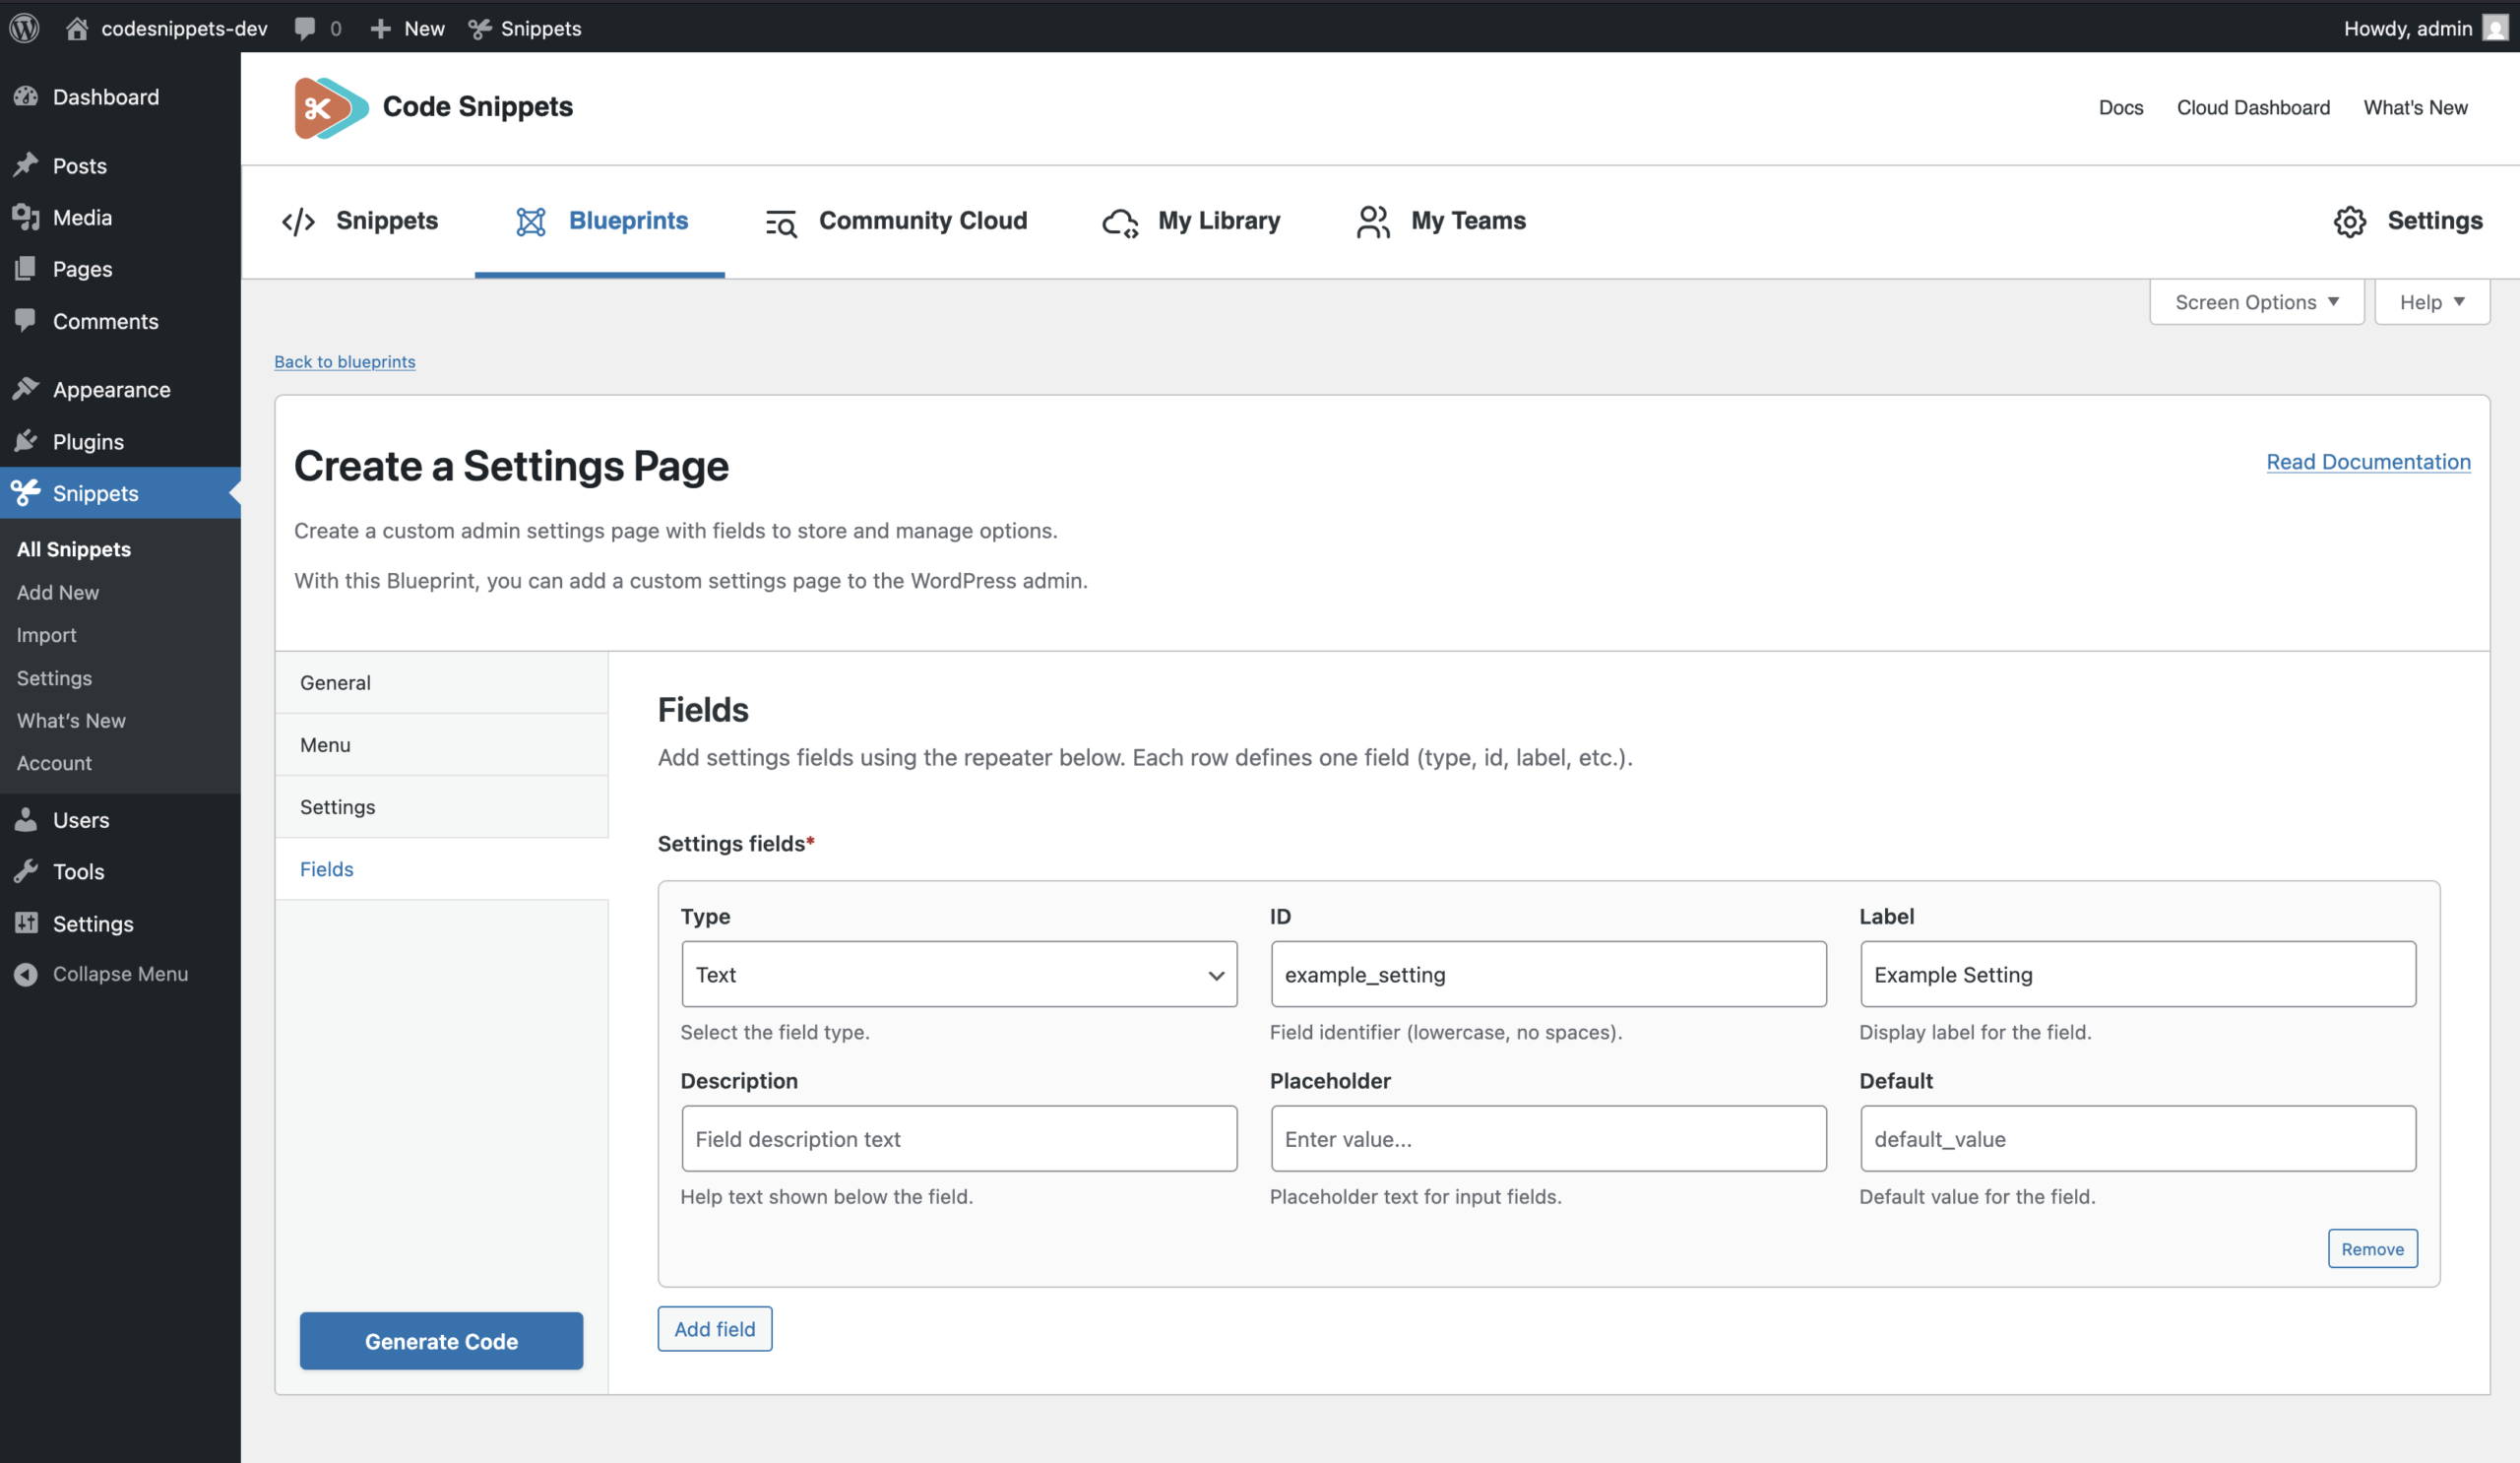
Each row contains the following values.
Type (required)
The type of form control used for the field.
Options include:
- None
- Text
- Number
- URL
- Date
- Time
- Color
- Textarea
- Checkbox
- Checkboxes
- Radio
- Select
Rows with “Type = None” are ignored.
ID (required when Type is set)
The identifier used to store the value inside the settings option. Example: api_key, max_items
Rules: Must be a valid WordPress key.
Label (required when Type is set)
The text displayed next to the field. Example: API Key
Description (optional)
Help text shown below the field. Used to explain what the setting controls.
Placeholder (optional)
Text displayed inside the field input before a value is entered. Example: Enter your API key…
Default (optional)
The value used when the option has not been saved yet.
Options (required for Select, Radio, Checkboxes)
Defines the available choices for fields that support multiple options.
Format – Each option must be on its own line using this structure:
value|Label
Example:
yes|Yes
no|No
Another example:
red|Red
green|Green
blue|Blue
The value before the pipe symbol is stored in the database, and the label after the pipe symbol is displayed to the user.
After Saving
Once saved, the generated code becomes a normal snippet. You can edit the snippet later to customize the settings page, add more fields, or adjust the generated code just like any other snippet.